Fix Smarter, Learn Faster: Your At‑A‑Glance DIY Companion
Start Where It Drips and Creaks
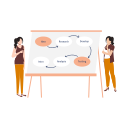
Seeing the System, Not Just the Symptom
From Panic to Plan in Five Panels
Tools That Teach By Sight

Color‑Coded Comfort

Shadow Outlines Prevent Delays

Torque and Tension Cards

The Faucet Flow
Start with water shutoff and pressure release; then document handle orientation before disassembly. Photograph each layer, replace worn O‑rings, inspect the seat, and apply appropriate lubricant where specified. Reassemble methodically, matching your photos. Finally, open valves slowly, watch for seeping, and test temperature range. The visual flow shrinks uncertainty and prevents tiny parts from becoming big frustrations.
Silent Breakers, Safe Hands
Electric concerns demand patience and clarity. A visual sequence shows plug removal, tester verification, panel labeling, and isolation steps before you touch anything. It highlights when to stop and call a licensed pro. If a reset is appropriate, you will see hand positions, stance, and recheck steps that prioritize protection while restoring function without loose assumptions or rushed decisions.
Patches That Disappear
A clean drywall patch follows a visible rhythm: square the hole, backer support, precise cut, tight fit, tape selection, thin coats, and controlled sanding. The panels show knife angles, compound amounts, drying patience, and dust control. Follow the map and the wall forgets the wound, leaving a surface ready for primer, paint, and quiet satisfaction.
Spring and Fall at a Glance
Filter Timelines Save Money
Safety First Without Fear
{{SECTION_SUBTITLE}}
Electricity Respect, Not Anxiety